

SKIP AHEAD TO:
Adding many Employees at once (Importing)
Adding Employee profiles individually
Adding Employees from the Schedule
Notifications for Employees
Adding many Employees at once (Importing)
If you have many employees, the quickest way to add them to 7shifts is to import them through our handy importer tool using an excel (.xlsx) spreadsheet, and following the template.
- Can add employees
- Can edit employees
- Can delete employees
1. The instructions on how to import are listed under More > Employees > Import.
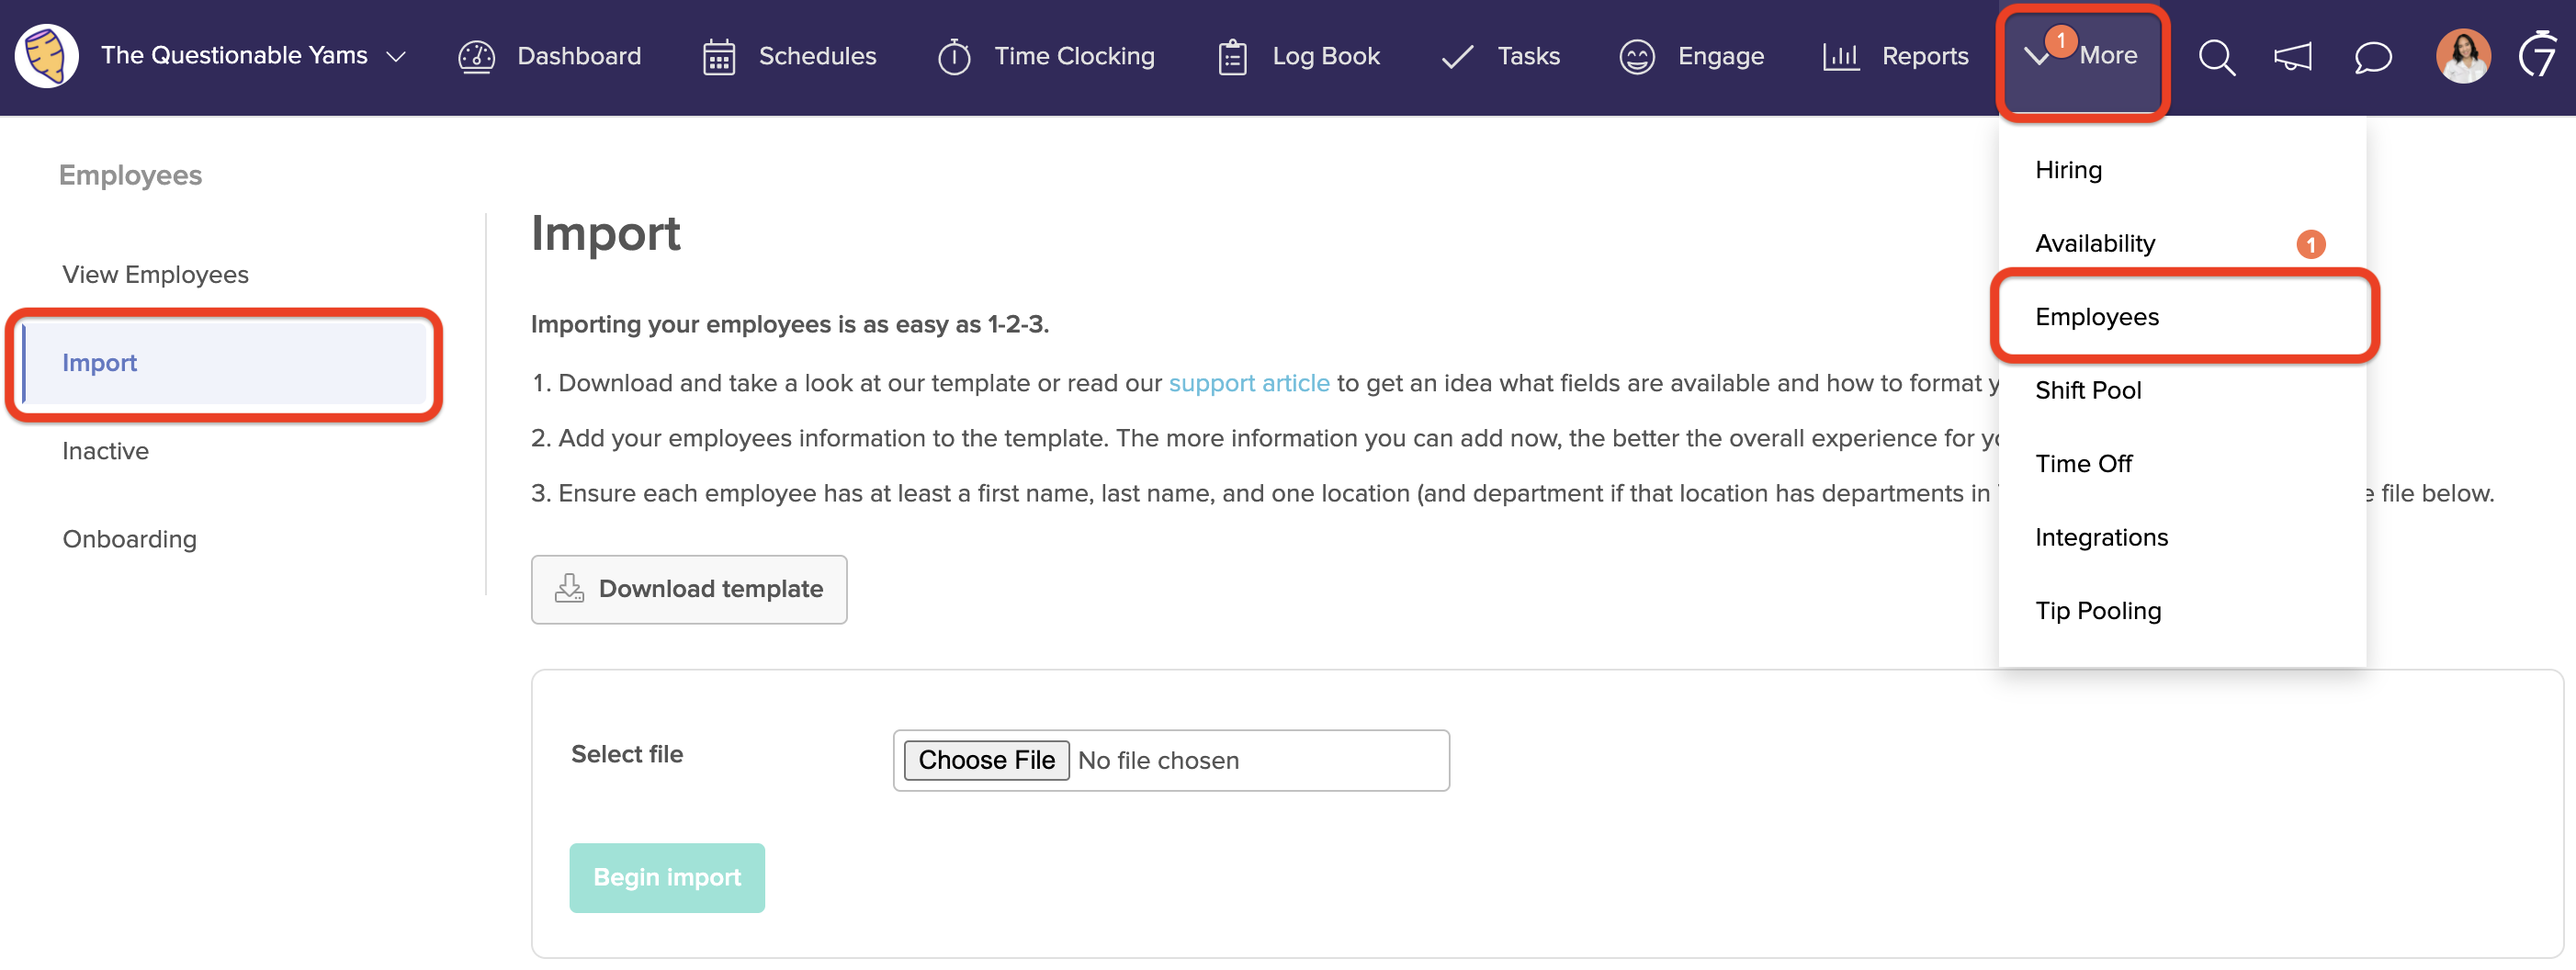
2. You can download an example of the template to fill out with your employee's Information. Ensure that your team members are assigned to all of the Locations, Departments, and Roles they will require access to in 7shifts.

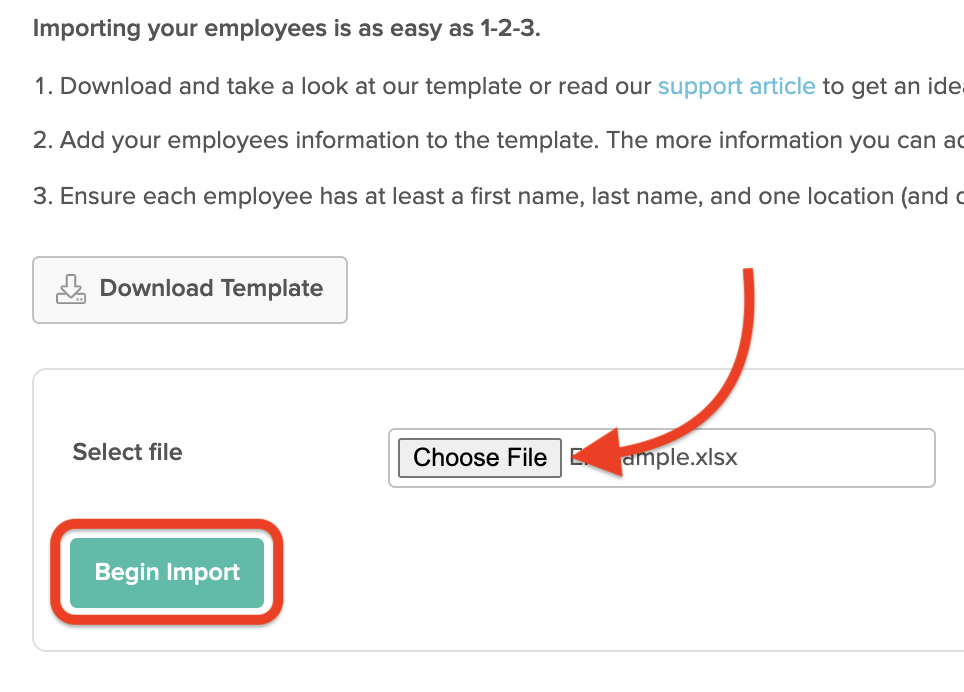
3. Next you can upload your spreadsheet and click on 'Begin Import'. Ensure that the file is in .xlsx (excel) format.
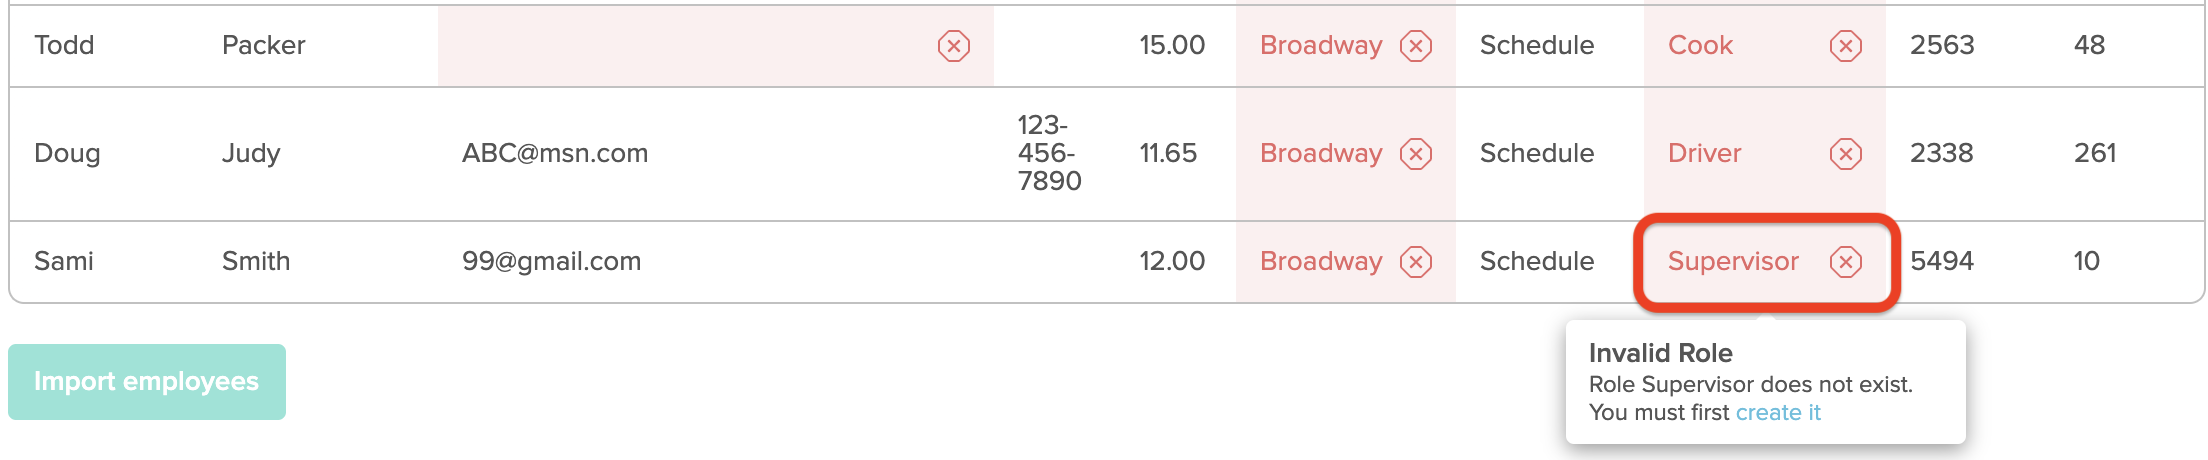
If you encounter any errors, view more details about what is required by hovering over them:

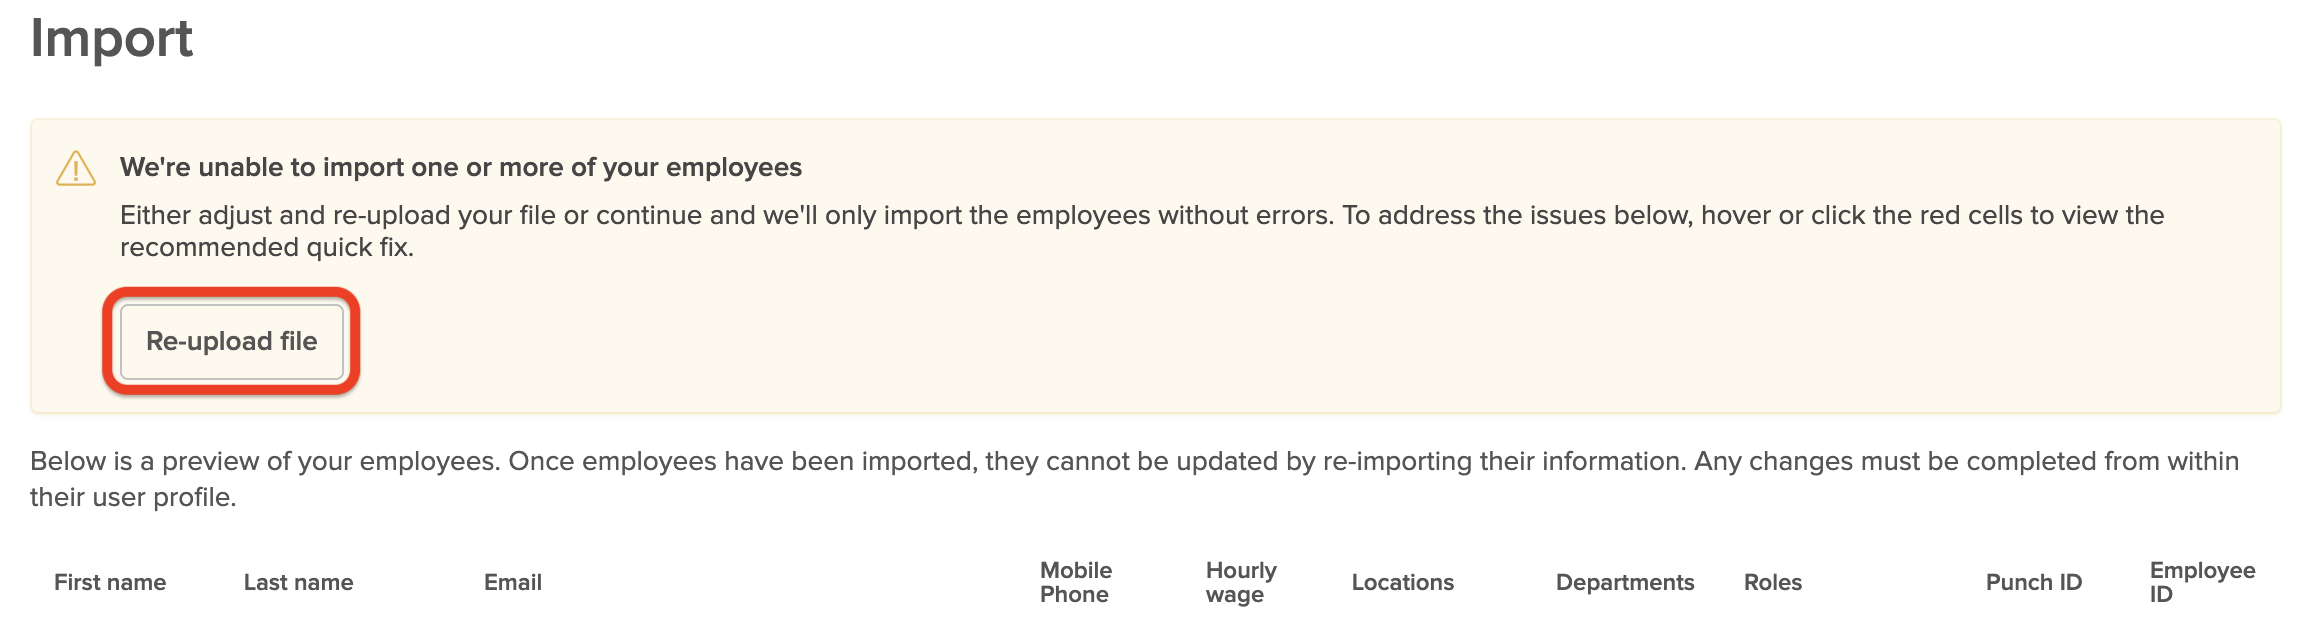
4. From there you may need to make changes to your Account Structure, or simply update the employee's information within the spreadsheet before that employee can be added. After you've made any changes needed to your file, you can attempt to upload it again by clicking 'Re-upload file.'
Alternatively, you can ignore these errors and still move ahead with adding just the employees that did not cause any errors, since they will already have all of the required details.
5. Before you add your staff, you will have the option to invite your employees. However, this can be skipped if you prefer to manually invite your Employees later.
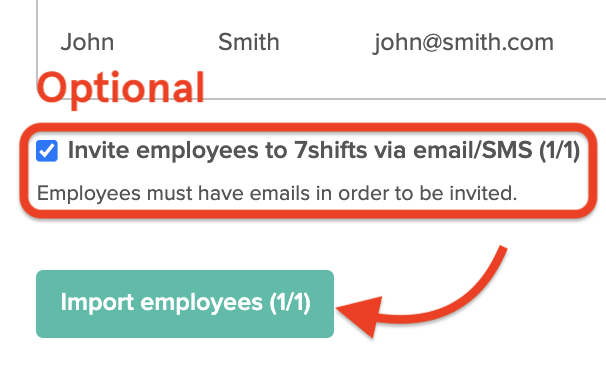
6. As soon as you click on 'Import Employees', your employees will be populated into 7shifts.
Please note that any of the users added to 7shifts through this method are automatically set up as Employee user types only. Learn more about Adding Managers here.
For more information, please contact support@7shifts.com.
Adding Employee profiles individually
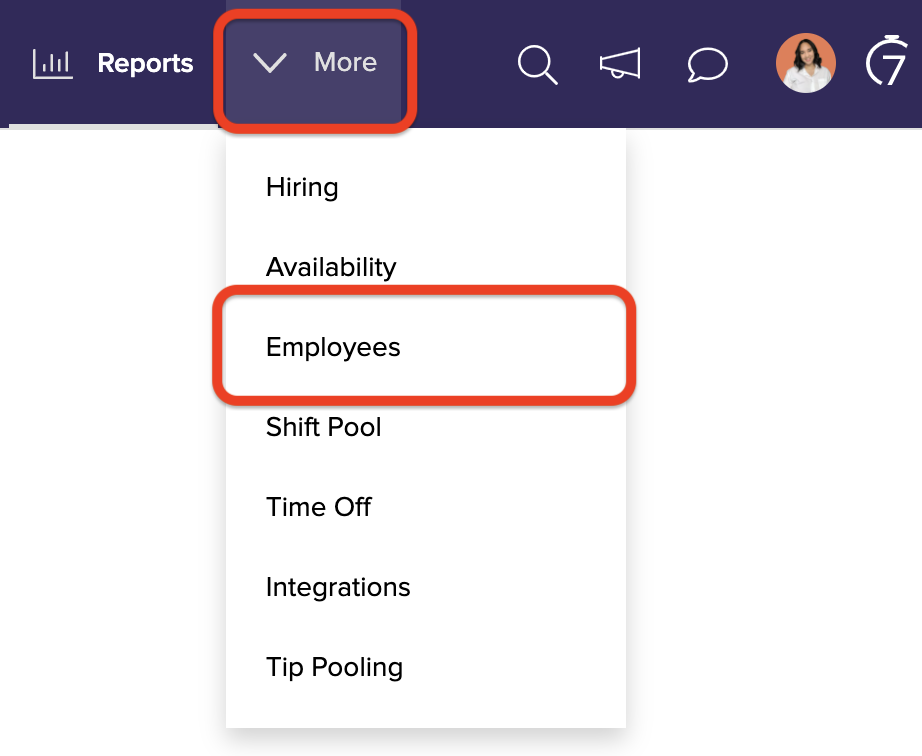
1. Go to More > Employees.
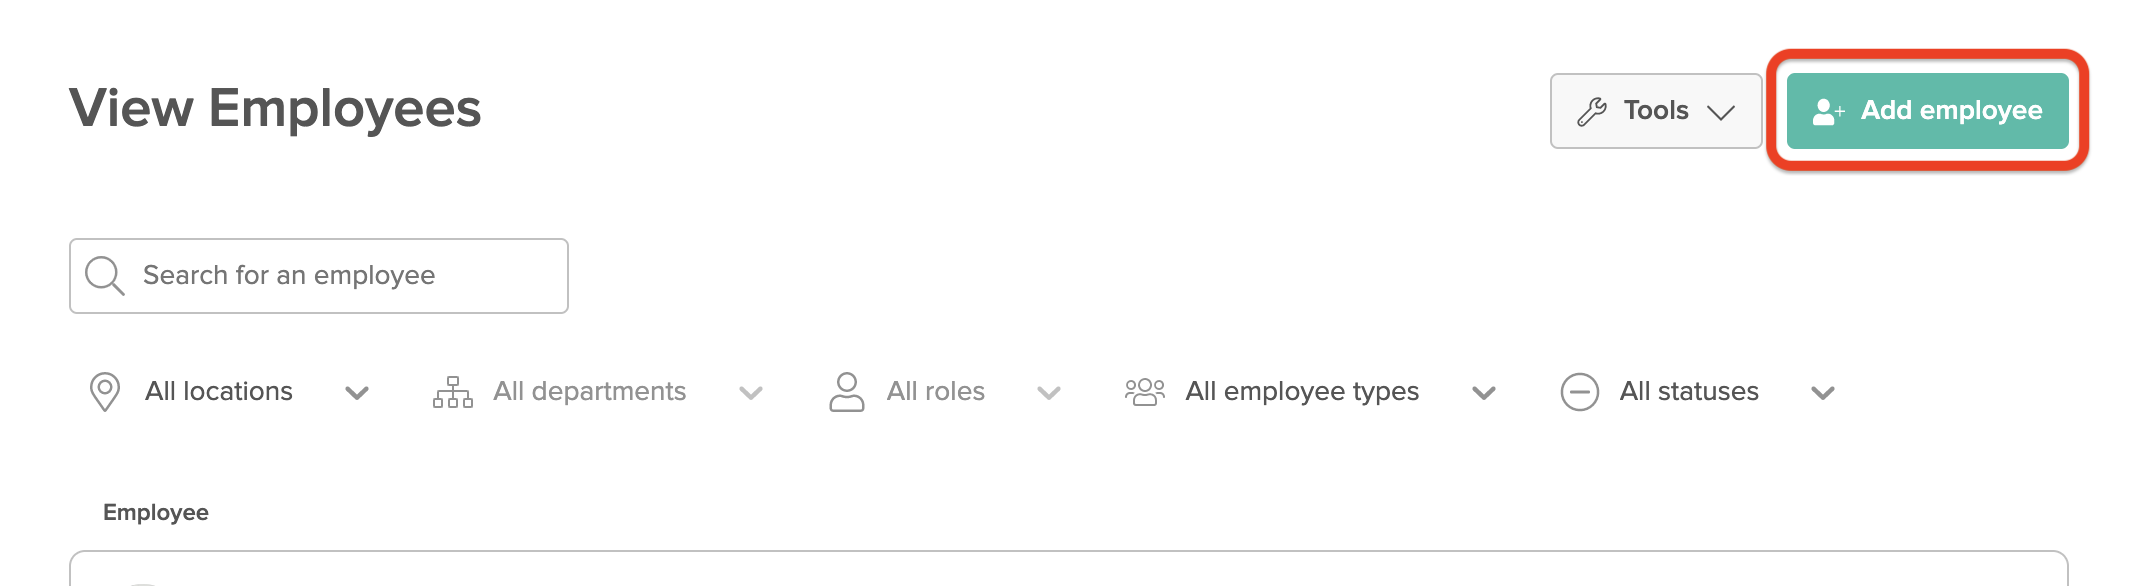
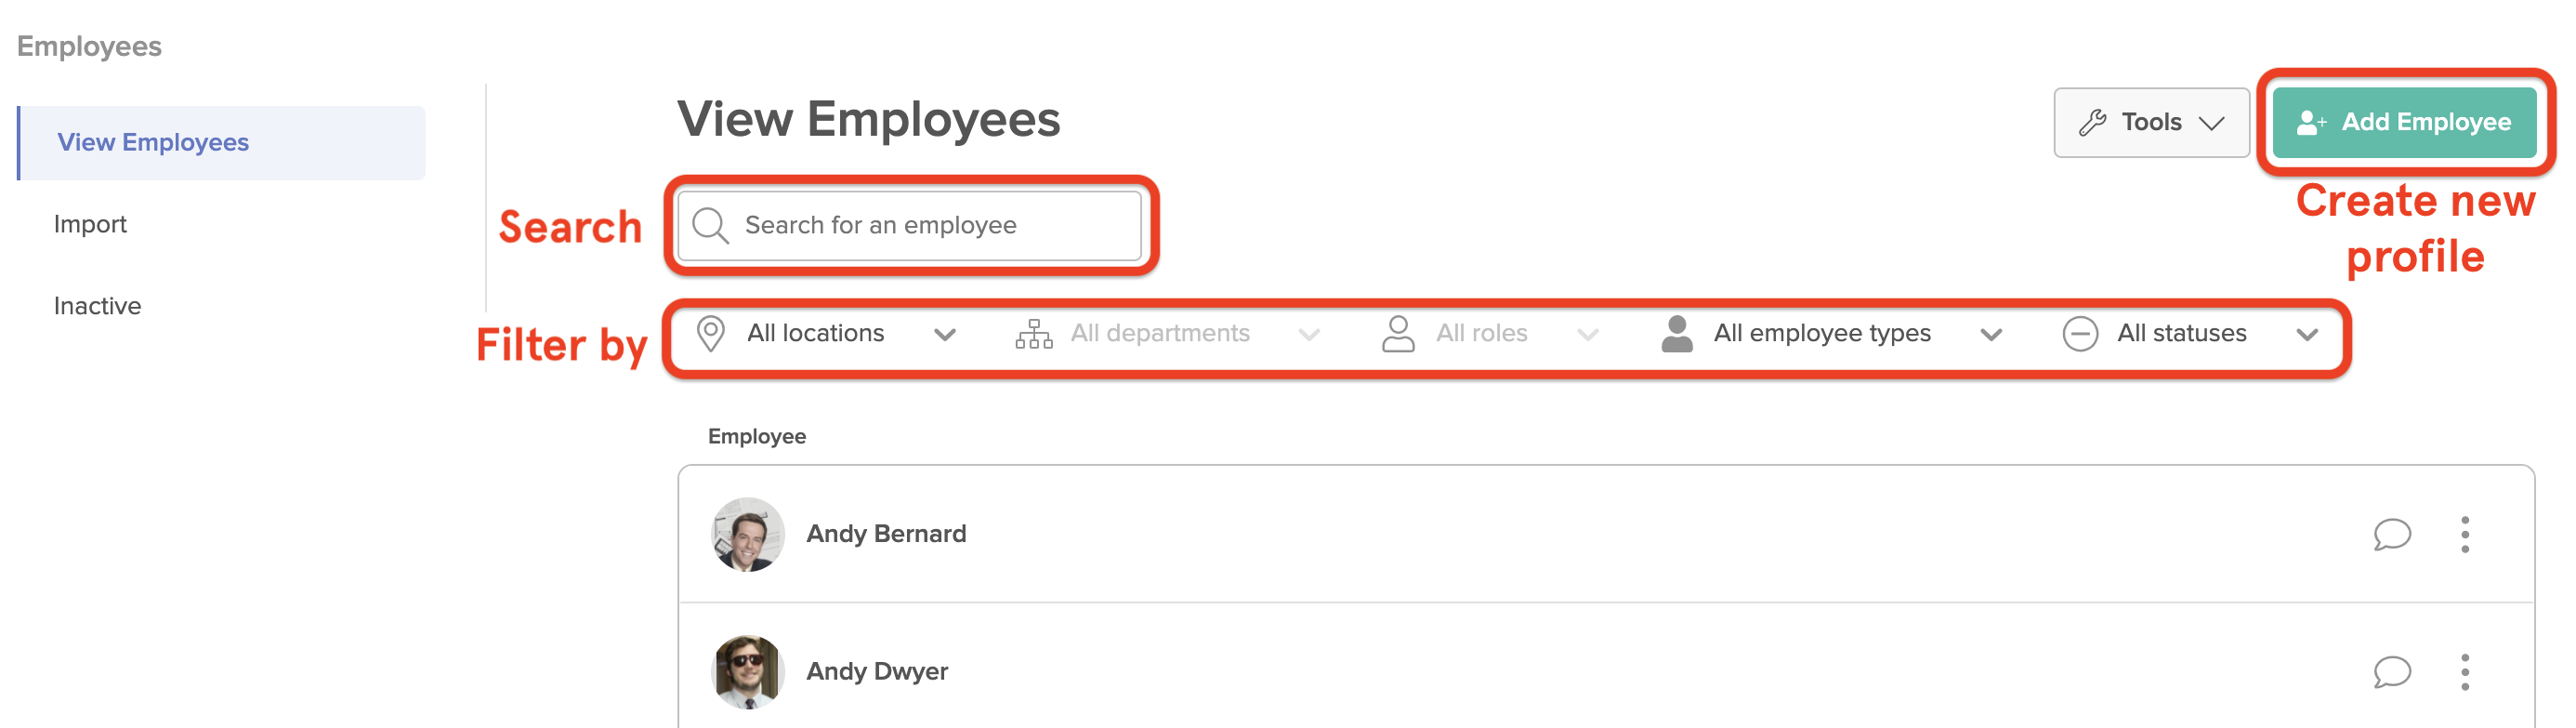
2. Click on the green '+ Add Employee' button to create a new user profile.
If their user profile already exists in the account, you can:
- Search for their profile, or use the filter options to view Employees of different categories
- Send them a message by clicking on the Message icon
- Reactive their user profile if it's currently inactive
- Click on them to view or edit their information and assign them to additional Locations, Departments, or Roles
3. After clicking on the green '+ Add Employee' button, a window will pop up where you can provide the Employee's details.
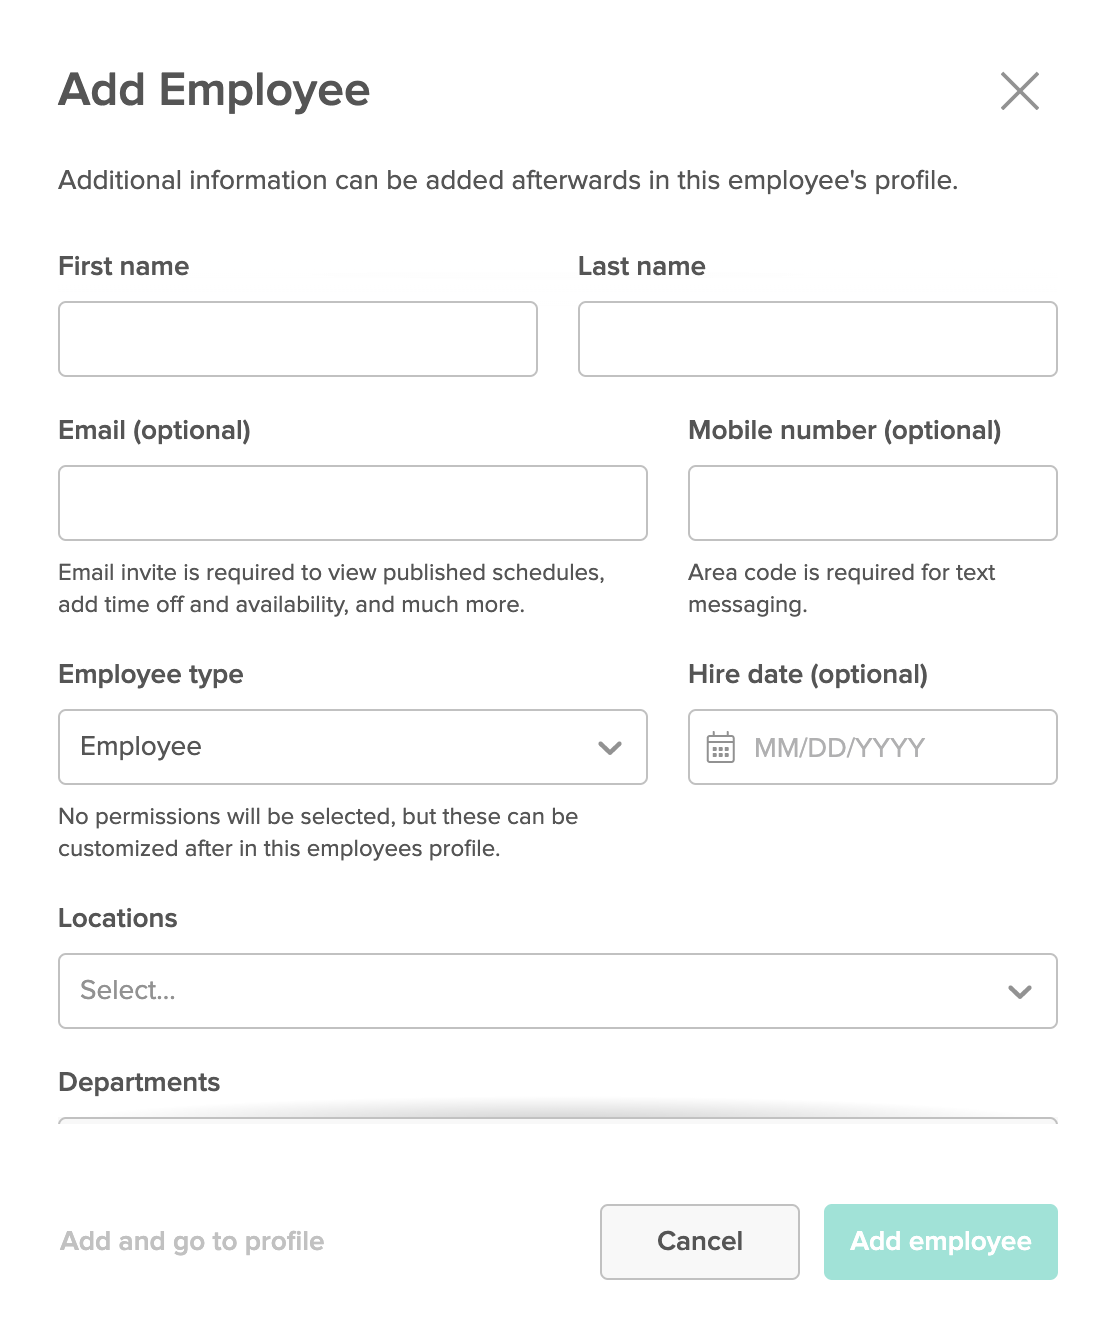
Key pieces of information to enter in the Employee's profile include:
- First and last name
- Email address (all staff will require a valid email address to log into 7shifts)
- Mobile number (for SMS and push notifications)
- Their assigned Locations, Departments, and Roles
- Wage information
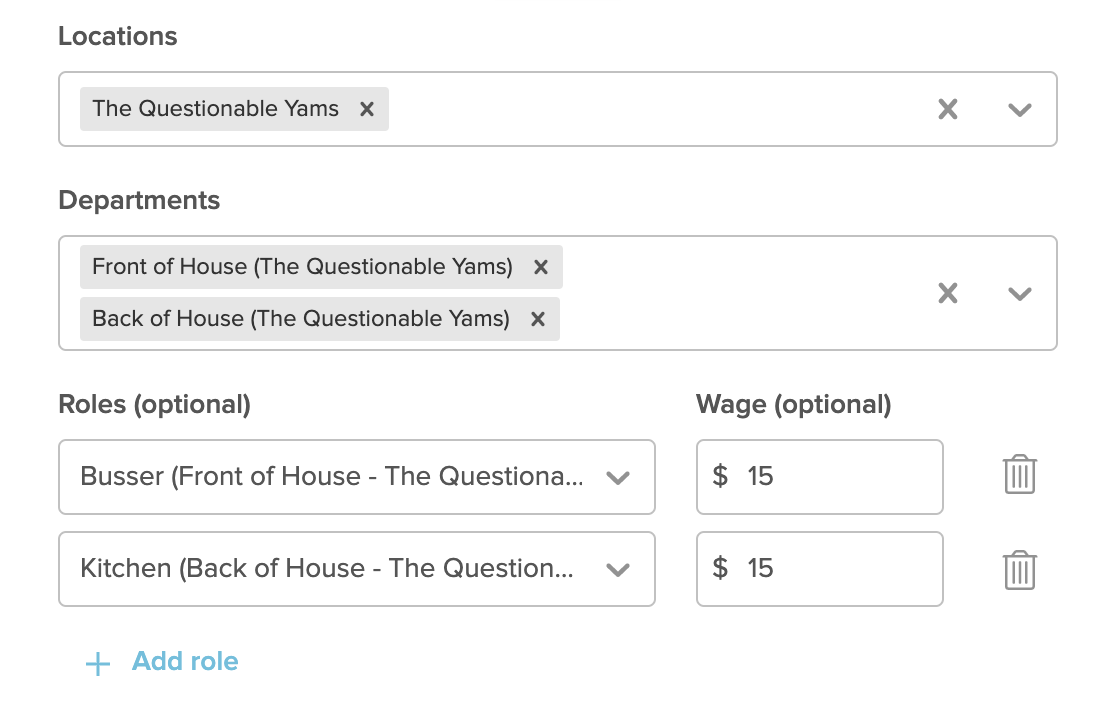
4. Ensure they're assigned to all of their required Locations, Departments, and Roles.
5. You can select to invite the employee when you add them or send them an invite to 7shifts later if you prefer.
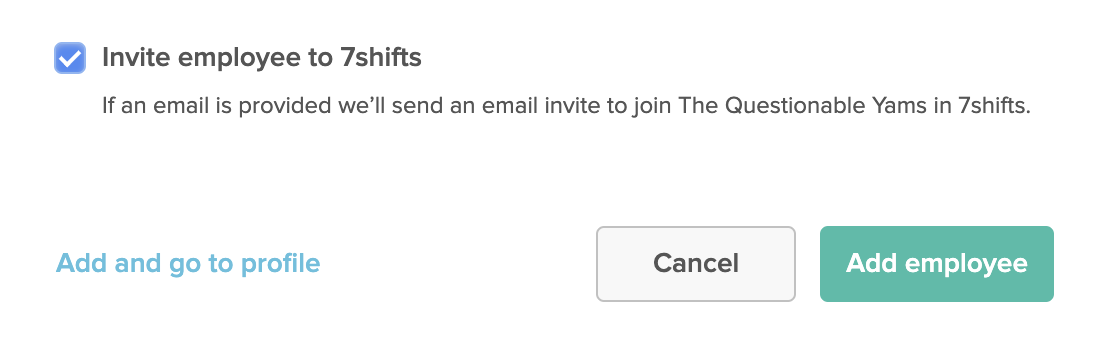
6. Click on 'Add employee' when you're finished, and they'll immediately be added to the account.
Adding Employees from the Schedule
Employees can be added directly from the schedule allowing you to add new Employees on the go. Schedule them for shifts without having to navigate away from the Schedule page.
To add Employees from the Schedule:
1. In the top left corner of the Schedule, select Add Employees > Create new employees.
Alternatively, if the user already exists in the 7shifts account, select 'Assign existing employees.'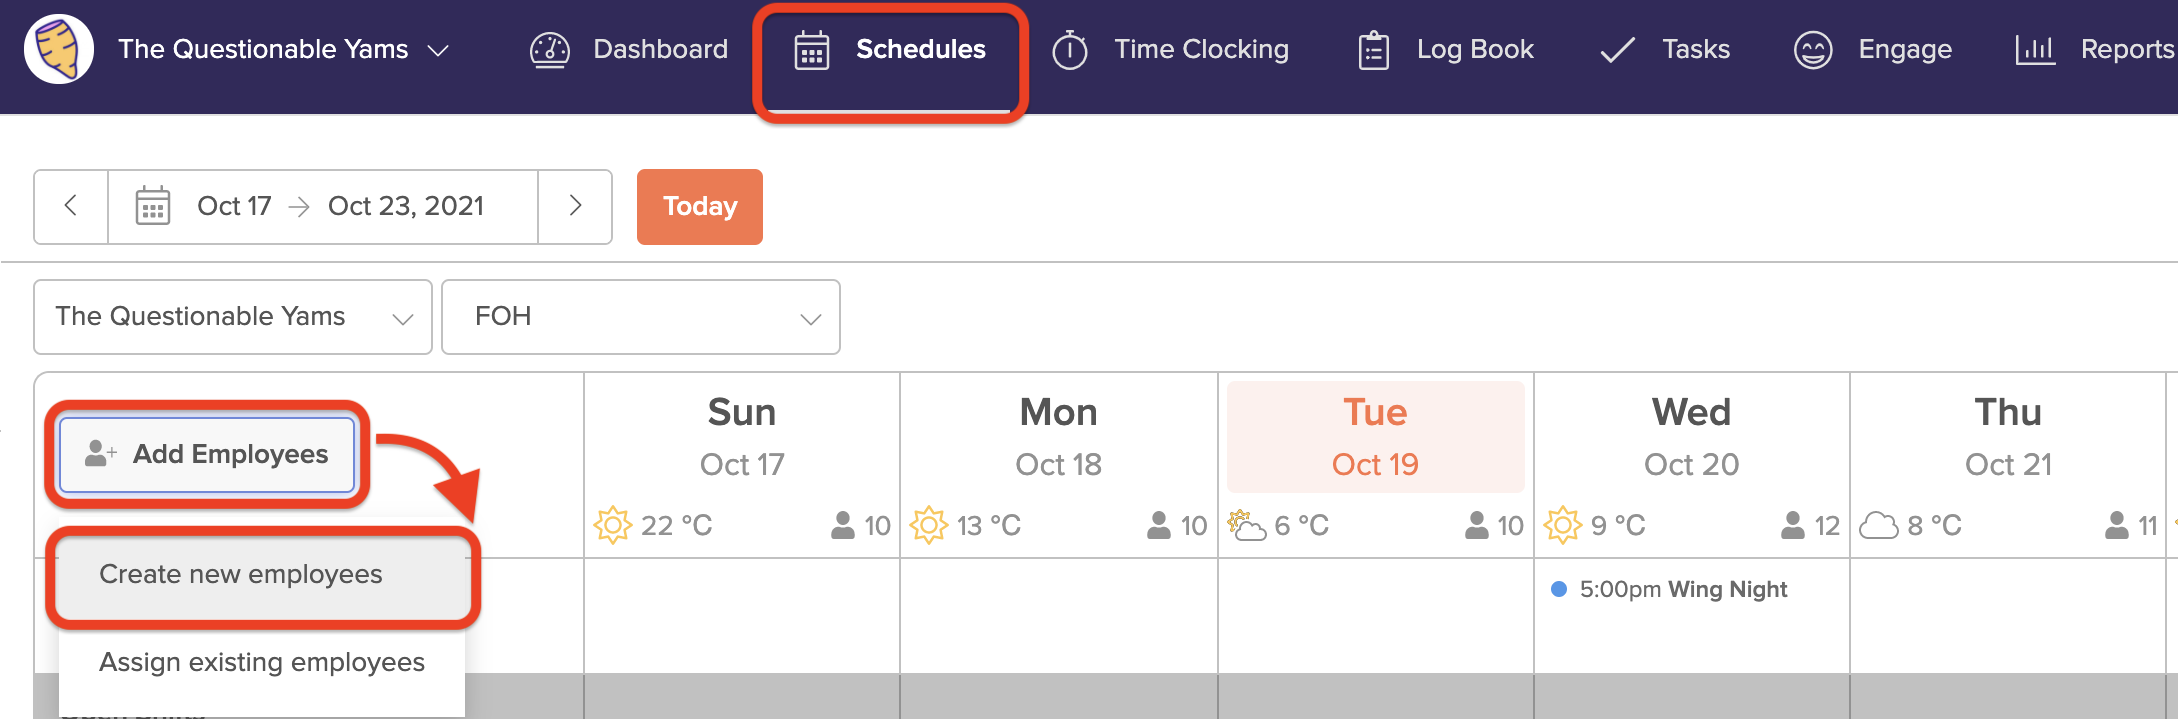
2. From there, you'll be asked to fill in a few details for the employee:
- First and last name
- Email address (all staff will require a valid email address to log into 7shifts)
- Mobile number (for SMS and push notifications)
- Their designated Roles that they will perform
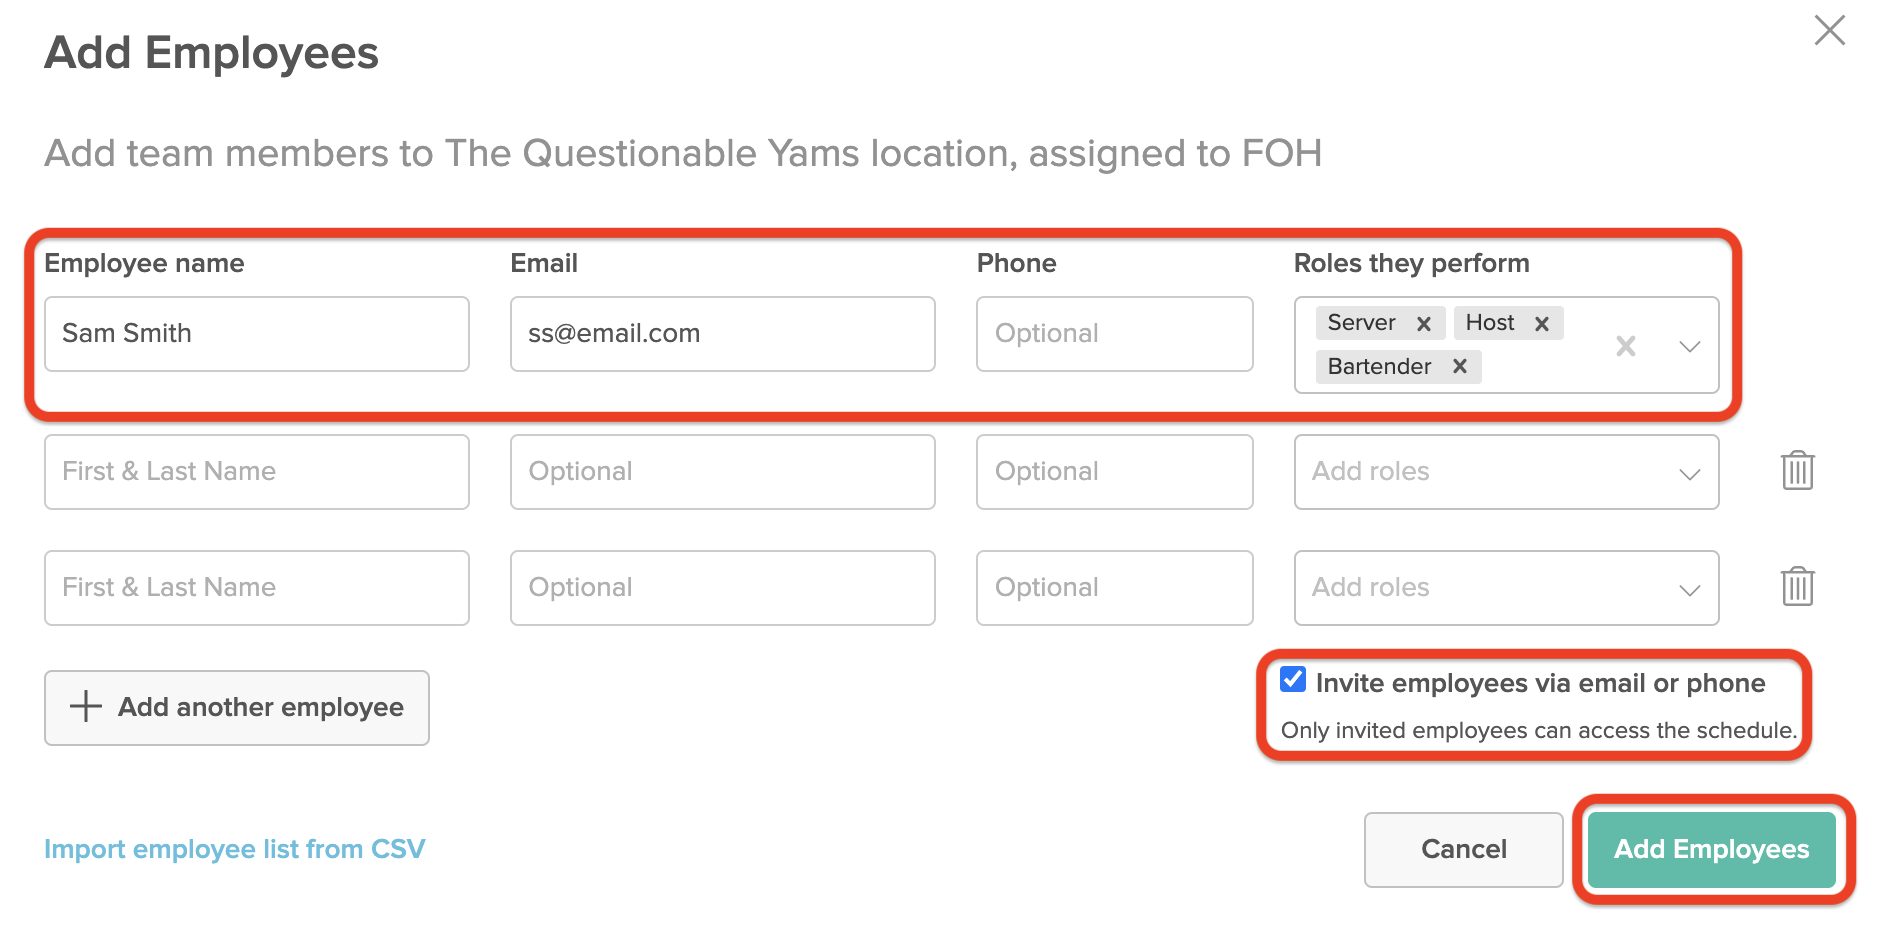
3. Once you've filled out the employee details, check the 'Invite employee(s) via email/phone' (you can do this later from their profile if you're not ready).
4. Click 'Add Employees' to confirm and save these new profiles.
You will be taken back to the Schedule page and can begin scheduling these employees right away.
Notifications for Employees
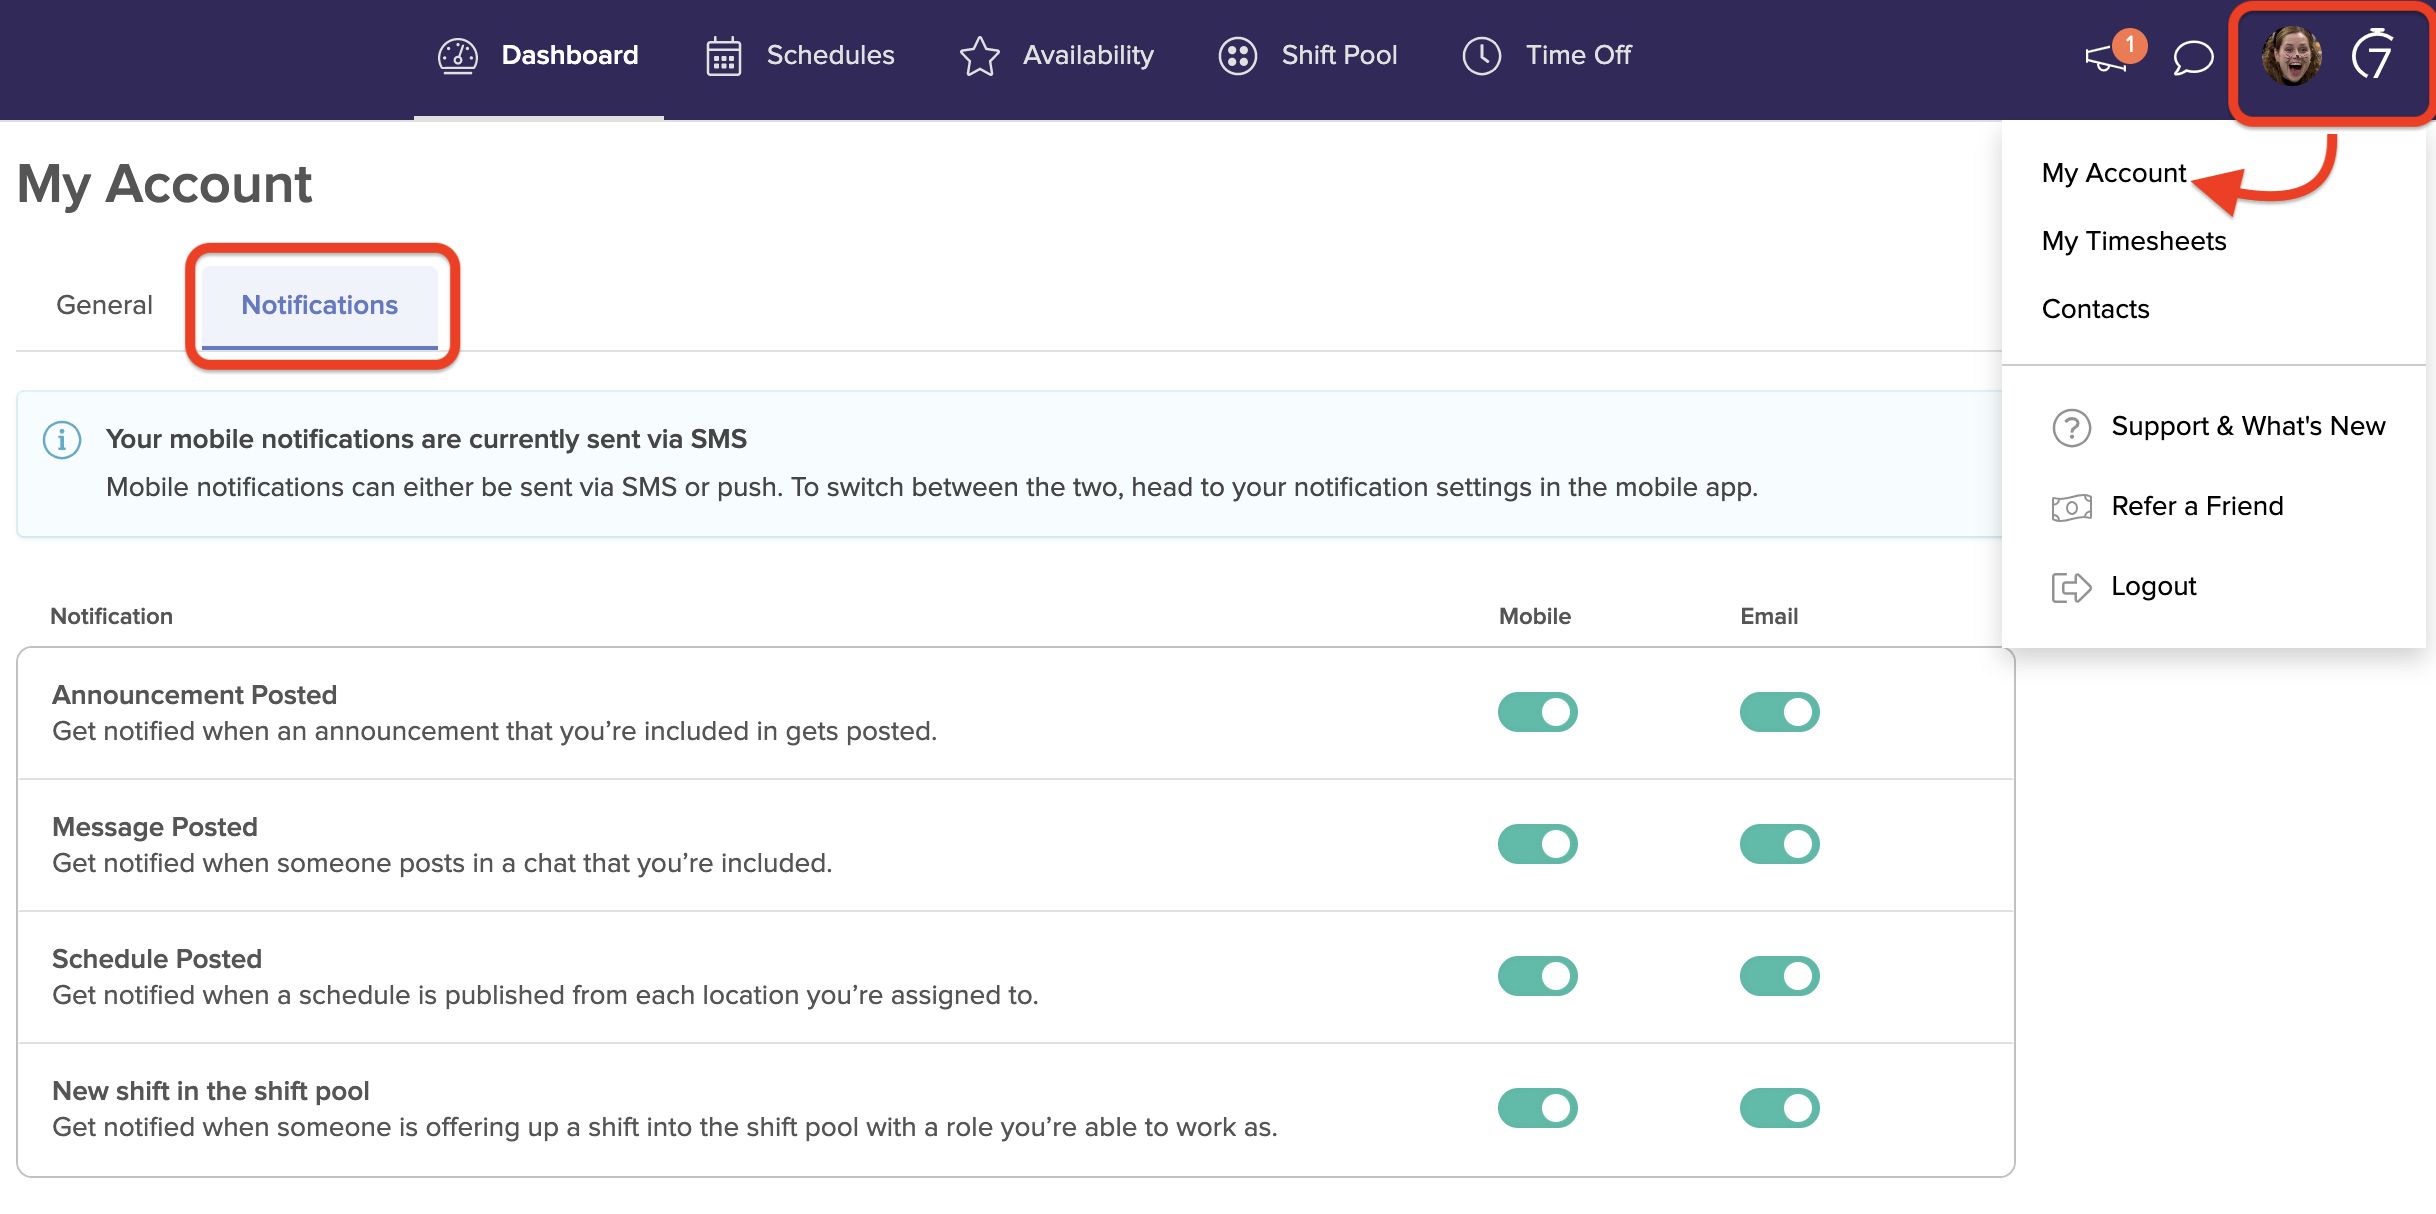
Employees will be able to customize their notification preferences within their own accounts. For example, if they don’t want to receive SMS/push messages, they can edit notifications so that they only get emails.
They can access these notifications settings, at any time, under My Account > Notifications.
Comments
0 comments
Please sign in to leave a comment.