
Creating a Task List
1. To begin using 7tasks, click on the 'Tasks' tab at the top of your page and select 'Create a task list.'

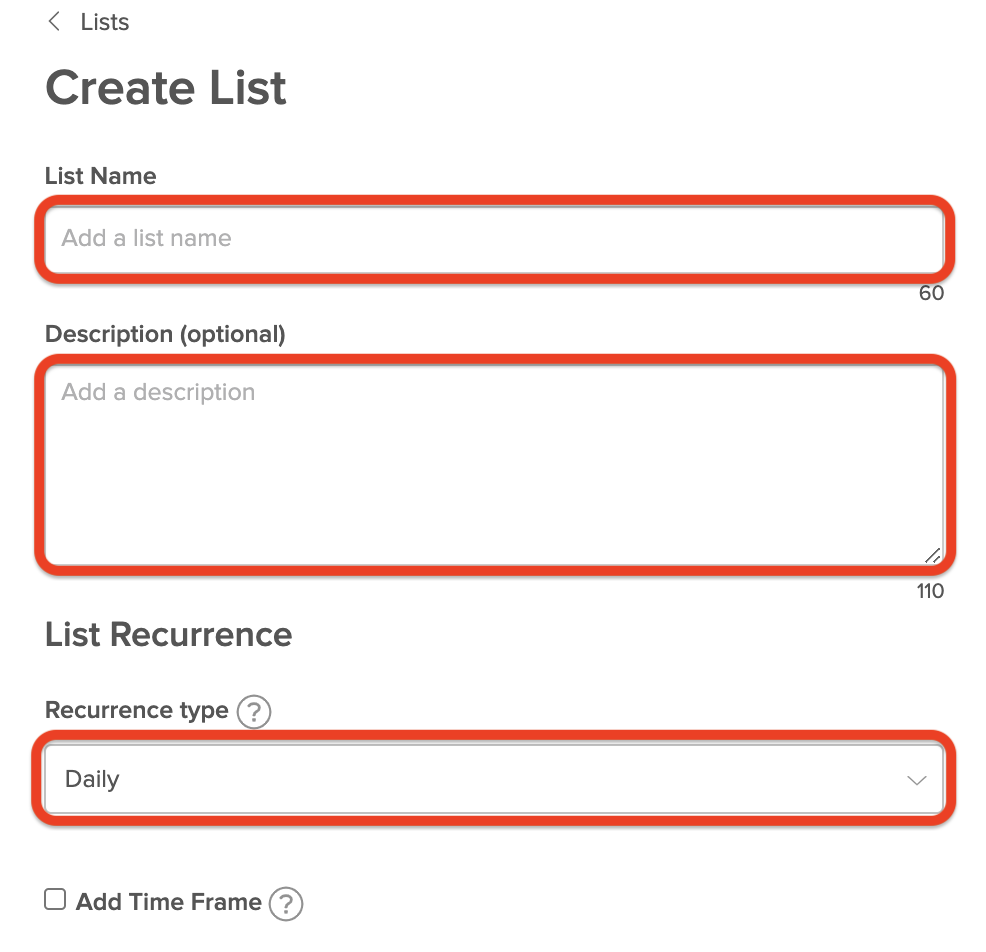
2. Next, name your list, add a description, and set the recurrence.
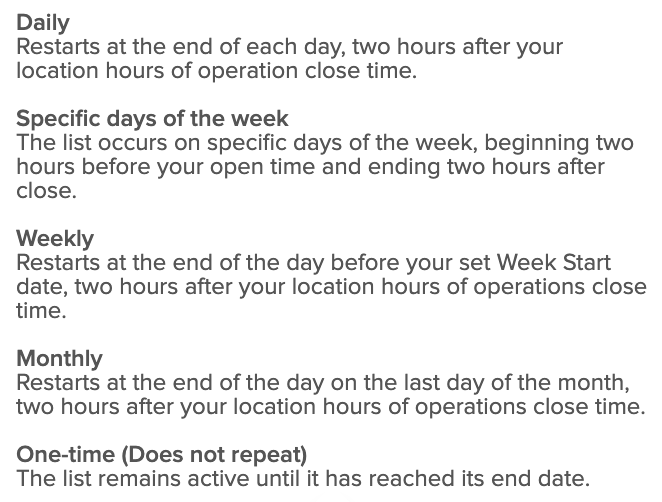
Below are your List Recurrence options:
However, you can still make a copy of an existing list and then choose a different recurrence for the copy. Click here to learn more.
3. Select if you would like to set a specific Time Frame for this task list. After checking this box, you'll be able to enter a start time and set a time for when the task list is due.
If selected, the task list will only be visible for Employees after the beginning of the Time Frame. The list will become overdue if there are still any incomplete tasks by the end time.
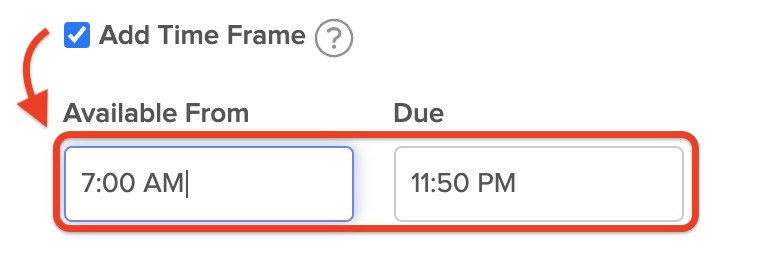
- Adding a Time Frame is only available when using the Daily, Specific Days of the Week, or One-Time recurrence options.
- The Time Frame entered will apply to all tasks within this list.
- One-Time lists will only require a due date (the end time is optional).
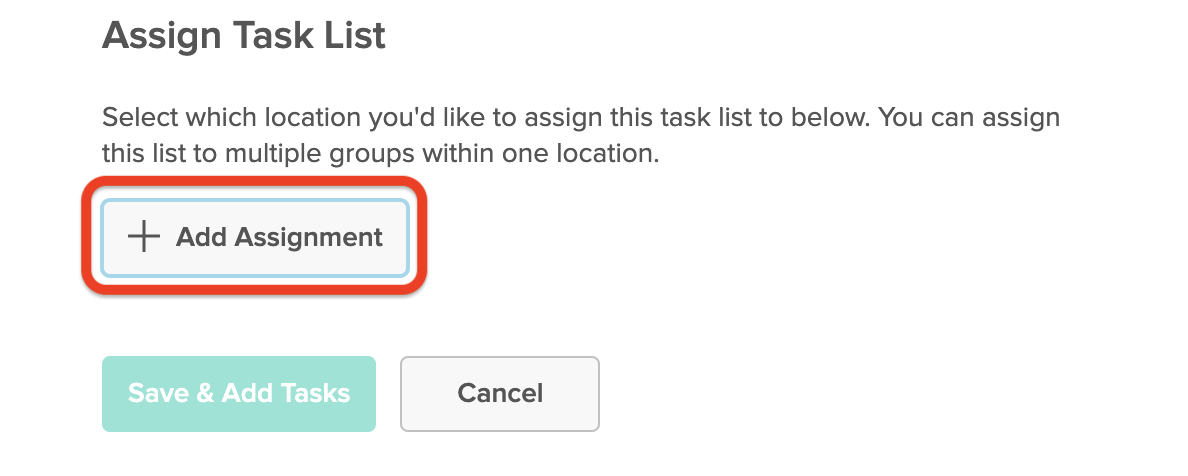
4. Click on '+ Add Assignment' and a Location to assign your list to.
Additionally, you have the option to assign the list to a Department or a specific employee under that Location.
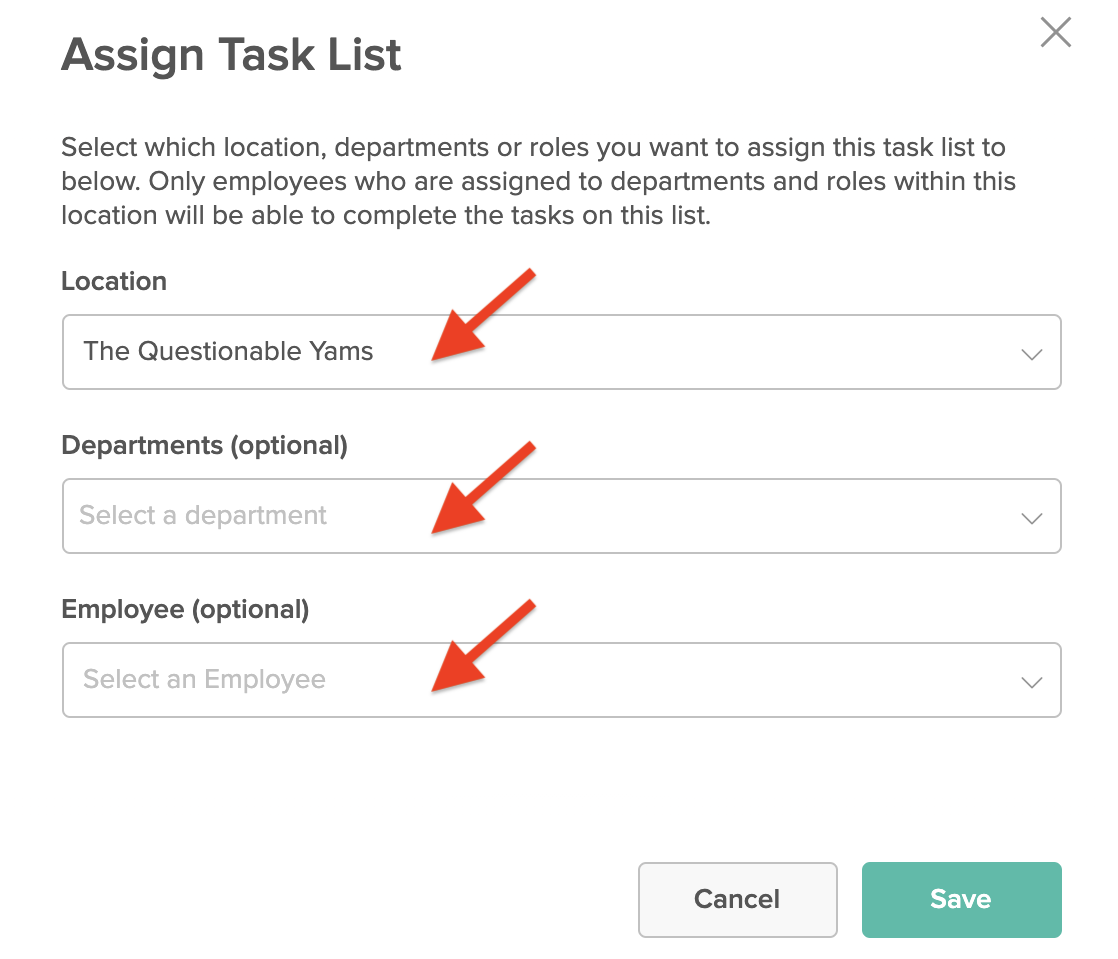
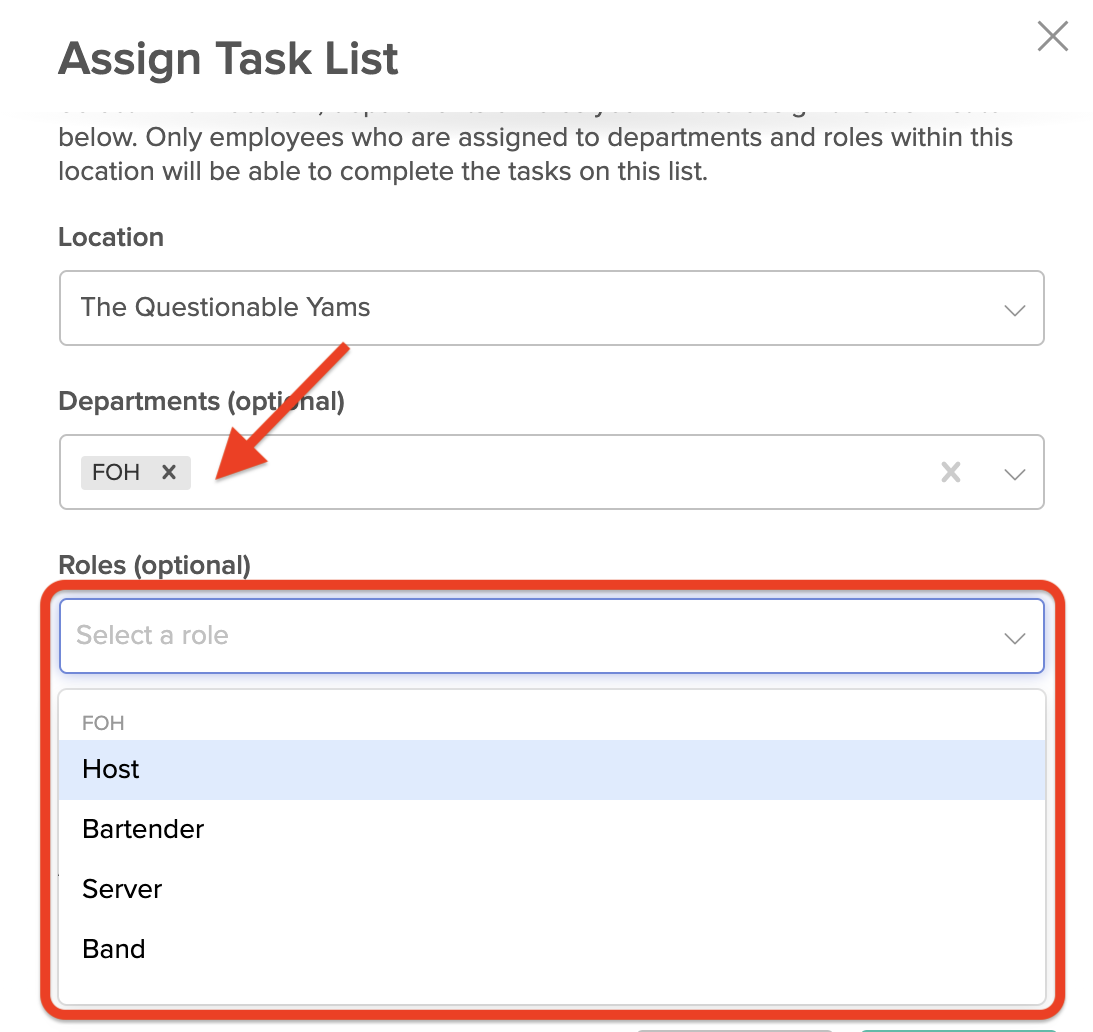
Assigning Lists to a group (Location / Department / Role):
If assigning the list to one or more Departments, the option to target specific Roles will also appear. You can add multiple Location, Department, and Role assignments by clicking the '+ Add Assignment' button after saving.
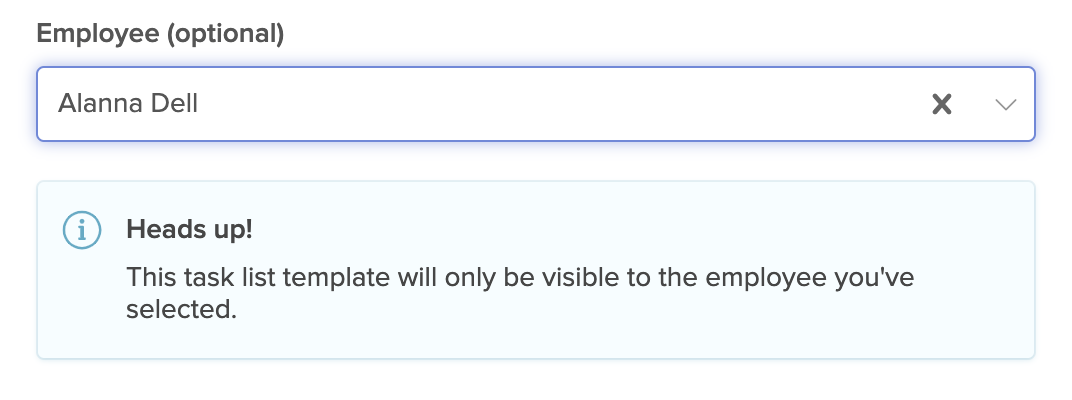
Assigning Lists to an Employee:
If assigning an entire task list to a specific employee, select their name by searching it in the text box or scrolling down. Only one employee can be selected. (See the step above to assign a list to multiple employees).

5. After choosing who the list will be for, click 'Save & Add Tasks' at the bottom of the page.
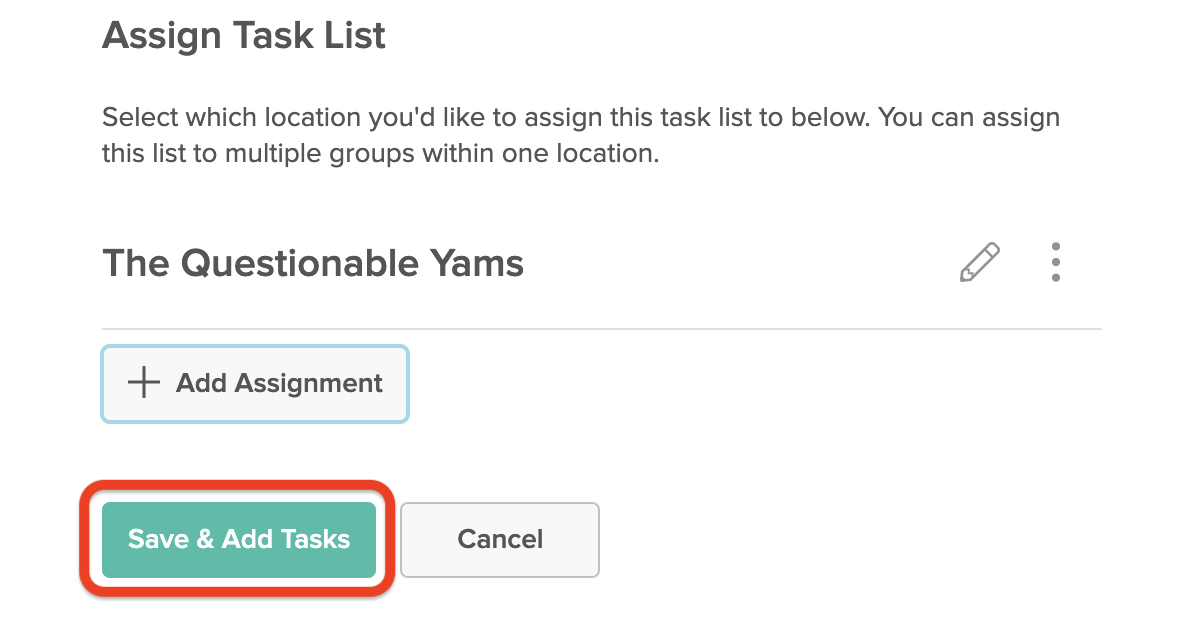
You are now ready to add tasks to your new task list!
Comments
0 comments
Please sign in to leave a comment.